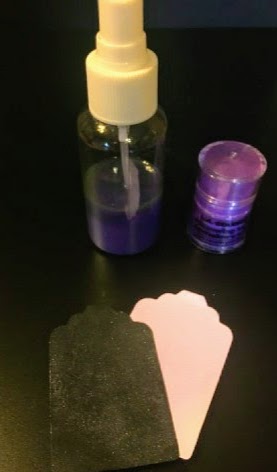
I like to alter paper. Many of my projects end up being mixed media even if I don't plan that when I start out. When things are not turning out how I hoped, or like, I try to follow the advice of the well known designers and just keep going. Often, I find myself grabbing the glimmer mist. Being the budget crafters that I am, I always look to pick these beauties up at a discount. No one wants to pay $4.99 for a 2 oz bottle that you will run-through in a month if you are shimmer crazy like me. You can often find them at Tuesday Morning for half price, but that is hit or miss and recently, they have been carrying multipacks that include colors that I either have or just do not care for. DIY to the rescue! Below is my Dollar Store recipe that I have made in many colors with great success.
$10 worth of ingredients from Dollar Tree will create 6 colors off glimmer with enough left over to make
a 2nd batch. If you are not sure of how much you will use of any specific color, use less mica and alcohol.
Ingredients:
Alcohol *see notes
Bottled water *see notes
Mica - L.A. Colors eyeshadow
Liquid hairspray
Spray bottle *see notes
Glycerine **optional / drugstore
Acrylic paint **optional
*NOTES: use 70% alcohol undiluted or 90% alcohol
with a 60 alcohol to 40 water ratio. Dollar Tree Alcohol
is 50% concentrate, DO NOT ADD WATER!
Eyeshadow - Snow White for pearl on any surface. Sunshine = gold. Play with colors to find combinations that you like. Use any shimmer eyeshadow with mica as 1st ingredient.
 Spray bottles ... You can buy travel bottle set OR a body spray bottle for same price. Depends on how much you want to make. Dump the body spray and rinse; do not wash with soap! It may still smell so pick something you like. Trim the tube at an angle so that it is not touching bottom of bottle.

- Remove eyeshadow brush and tap mica into bottom of the lid. Be patient, this takes a couple of minutes. Measure 1/4tsp mica and add to travel size bottle. The Dollar Tree bottles are 2.7oz.
- Add 1 TBSP liquid hairspray, swirl to combine. This is a binder and keeps the mica from flaking off when dry.
- Add alcohol until bottle is 3/4 full.
- OPTIONAL Add 3 drops glycerine for travel bottle. It helps with flow but increases drying time.
- Shake well without spray tube, use the solid cap or otherwise cover the opening.
- TEST on white paper. Add more mica as desired.
- If happy with shimmer color, add sprayer and cap. I recommend labeling with the color of eyeshadow used for future reference.
 |
| Paint + Mica = Opaque color shimmer |
SWIRL! Do Not Shake to keep sprayer from getting clogged. Do this each time for best results. The mica will settle. ----->>>
 |
| Pearl + White Paint |
If you want a colored spray with a pearl glimmer, add 5 drops of acrylic paint.
This will give you an opaque base color. Use ink for translucent color.
Leave out paint or ink for shimmer only.
The samples below were created using only mica.
 |
| Snow White adds a pearl shine to any project. |
 |
| Sunshine add Gold shimmer |
 |
Lollipop is a vibrant Pink
1/2 tsp mica was used here |
 |
| Gape Jelly adds a subtle Purple shine |
 |
| Radiant is a Copper shimmer |
 |
| Use mica eyeshadow to create shimmer sprays |


 I started with simple blue cardstock and used an embossing folder to add some dots for texture and fun. Then I used a 2nd folder with the Summer Fun sentiment, I love this effect!
  I went over the piece lightly with Distress Ink in Picket Fence to make the embossed images pop. I used a water brush to detail the sentiment with Distress Ink in Peacock Feathers. The entire front was misted with my DIY Rose Gold Shimmer Spray. Find that Recipe HERE. This was just the shine I needed compliment this Fluffy.